Friday, November 18, 2011
Zen Nettles
I find the movements of jellyfish to be very meditative and relaxing... so when I had an opportunity to record some at the Aquarium on the Bay in San Francisco, I took it! Sorry for the music, I was trying to merely mute the conversation you can hear otherwise... which is decidedly less-meditative. Enjoy!
Tuesday, November 8, 2011
Dictionaries are Fun!
One of my favorite pastimes is trying to determine the origins of an English word without having to look it up. Or I should more plainly state that I "guess". If I am motivated enough I'll go see if I am right.
Last night, whilst waiting for my 8 year old child to extricate himself from his bath, I pondered the origins of "pajamas". I am not kidding when I say that it is the next day and I was still plagued. I had no guesses. I could eliminate French, German... Latin... as any kind source of the derivation. Hmm... perhaps Greek? Finally the need to know got he better of me and I checked the online dictionary. Apparently it could be either Hindi or Persian! Who knew?
Here's what the dictionary said:
British, pyjamas
Origin: 1870-75; plural of pajama <Hindi, variant of payjama <Persian pay (leg) + jama (garment)
Cool huh? Learn something new every day!
It's Manly!
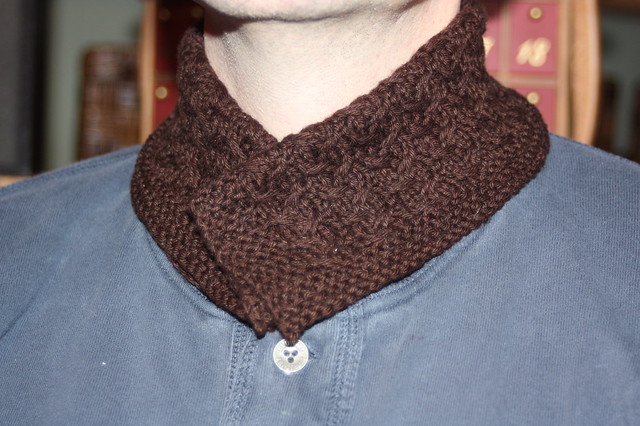
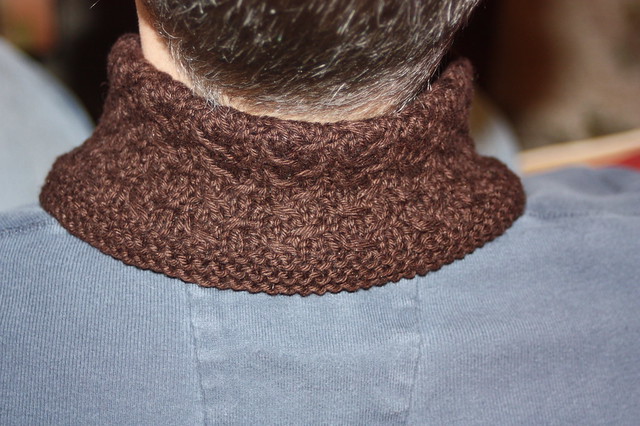
My next free pattern was a reply to a request for a "more manly" version of the Vegas Sands Cowl (*cough* Neckwarmer *cough*). It didn't take long to come up with a way to manage that... the stitch pattern lends itself very well to manipulation. So here you go, the Manly Collar.
Manly Collar (originally published Winter 2008)
Materials:
1 skein DK weight yarn (I used Knit Pick’s CotLin and at 123
yards I still had some left), get more if you are making a larger collar....
Size US7 needles (straight or
circular but I found the circs easier to maneuver) or size required to
get-gauge
Tapestry needle
One Button (I think it was 5/8")
Gauge: approx 5 sts/inch in stockinette, approx 5.5 sts/inch
in pattern
Finished size: about 6” wide by 19” long after blocking.
Pattern stitch (adapted from Grumperina’s Shifting Sands Scarf):
Worked over 5 stitches and 4 rows:
Row 1 (RS): *1/2LC, K2,
repeat to end
Row 2 and 4: purl
Row 3: *k2, 1/2RC, rep to end
Pattern:
CO 105 sts loosely using whatever method you like to give
you a nice-edge, I like to use the long-tail cast on because I can keep it nice and
loose.
Knit four rows (garter stitch border), then purl one row (WS)
Row 1 (RS): K5, begin pattern stitch (above) and repeat until 5 stitches
remain, K5.
Row 2 (and all WS rows except button hole row): K5, follow pattern to last 5
sts, K5
Row 3 (RS): K5, follow pattern stitch and repeat until 5 stitches
remain, K5.
Next row add buttonhole (WS): K5, P2, bind off 3 sts, purl to last 5 sts, k5
Next row: K5, continue in pattern (row 1 again) to your bind-off gap, use
backward-loop cast on to add 3 sts, k7.
Continue following pattern, keeping the 5-stitch garter stitch
border on each edge, and the pattern stitch in the middle. When piece is approx 5” tall ending with a row 1 or 3, change
to garter stitch again for four rows.
Bind off in your favorite manner.
Finishing: Block the collar and then weave in ends after it has dried. To sew on the
button I folded the rectangle in half lengthways and wrapped the collar around
my model’s neck, then placed a small pin (careful not to nick your model!)
where the button hole is. Then I sewed the button on where the pin was.
Abbreviations:
1/2LC: slip 1 st to cable needle and hold in front, k2, then
knit 1 from cable needle
1/2RC: slip 2 sts to cable needle and hold in back, k1, then k2 from cable needle
Note: If you take the time to learn Grumerpina’s “Cabling
without a cable needle” you will find it worth the time spent! Trust me! (http://www.grumperina.com/cables.htm)
If you would like to make this collar for a neck larger than 15", increase the number of cast-on sts by 5 for the number of inches you want to increase (i.e. if you want to increase to 16" increase by 5 sts). If you would like the collar to be a little taller, knit a few more pattern-rows before placing your button hole and add a few more rows to the end before working your final garter-stitch border.
*errata: There was an issue with the 5th row (first row after the garter edge) where I neglected to point out the 5 stitch garter edges! So after knitting four rows, the next row: k5. p95, k5, then continue as instructed.
*errata: There was an issue with the 5th row (first row after the garter edge) where I neglected to point out the 5 stitch garter edges! So after knitting four rows, the next row: k5. p95, k5, then continue as instructed.
Monday, November 7, 2011
More! Free!
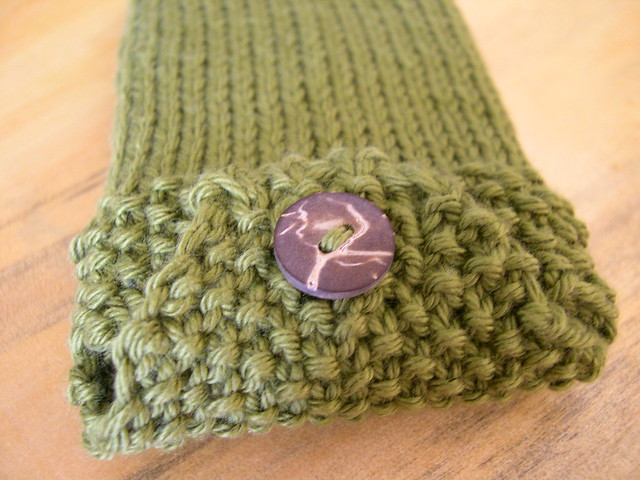
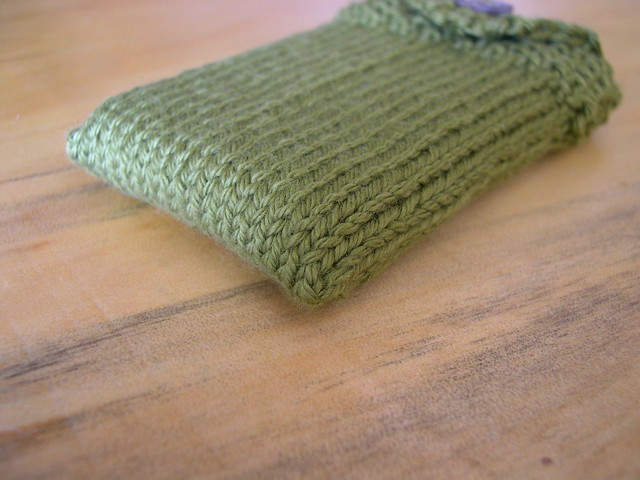
Continuing my efforts to republish designs that I had originally placed on another blog... I give you an iPod cozy. I would like to point out in my favor, that I believe I was one of the first few people to see Judy's Magic Cast On as useful for something other than starting toe-up socks. (Yes, I did just pat myself on the back, why do you ask?)
My iPod Sock (aka
the Shiny iPod Sock)
(called such because it's
"Shiny" (as in Firefly), the yarn is "Shine Sport" and it's
to keep my iPod shiny... triple threat! Originally published summer 2008)
Materials: a small amount of sport weight yarn, wool is best but anything will work; size 3 (3.25mm) needles
(dpns are fine but a circular needle for magic loop method is recommended); tapestry needle.
Gauge: 5.5
sts/inch 7 rows/ inch in stockinette
Notions:
one 5/8” button
Using Judy’s
Magic cast on, cast on 36 sts total.
Start
working in stockinette stitch. The first
few rows of stockinette will be a bit fiddly and difficult to maneuver, but soon things start to relax a bit and life gets
easier....
Continue in
stockinette until the pouch measures about 3” to 3.25” then switch to seed stitch
and continue for 8 or more rows (this is a good time to put the ipod in the
sock and test out the length).
Bind off
all the stitches on one side of the sock (half the total sts) so that you are working back and forth
on the other side, this will be the flap.
Work seed
stitch (k1, p1, repeat) back and forth on 18 sts for 3 rows
Next row: Work
a decrease row (ssk, seed stitch to last two stitches, k2tog) (16 sts)
Next row:
seed stitch across (make sure to purl the knits and knit the purls)
Next row: Decrease
row (14 sts)
Next row:
seed stitch across
Next row:
Decrease row (12 sts)
Next row: k5,
bo 2, k5 (10 sts)
Next row:
ssk, seed stitch for 3 sts, co 2 sts, seed stitch for 3 sts, k2tog (10 sts)
Next row:
seed stitch across
Next row: work
one more decrease row (8 sts).
Bind off.
(I used the “invisible Bind-off for Single-rib” found on page 46 of the Fall
’08 Interweave Knits)
Weave in
your ends, sew on your button, insert iPod and Enjoy your tunes scratch-free!
I realize these days that the MP3 players and smart phones may not share the dimensions of a 3rd gen iPod, so if you would like to use this sock for your more modern accessory, measure the object, multiply inches by gauge and work out how many sts you will need. When it's long enough, bind off half the sts and work the flap as close to the same number of repeats as possible... if you have any trouble working it out yourself, leave a comment and I'll try to help!
Cheers
Sunday, November 6, 2011
M.C. Knitalot
Hello again!
One thing you may or may now know about me is that I am a fairly rabid knitter. I will try not to get too crazed about it here, but I would love to share my few designs and perhaps a finished object or two of which I am very proud.
Since I originally shared some patterns on another blog, and have permission of my blog-partner... I thought I would start re-publishing them here where I am sure to be more active and can support those who would like to use the patterns now! Rather than add them all at once, I think I will go slow... Maybe I will start with a couple of my very first attempts to share patterns with the world...
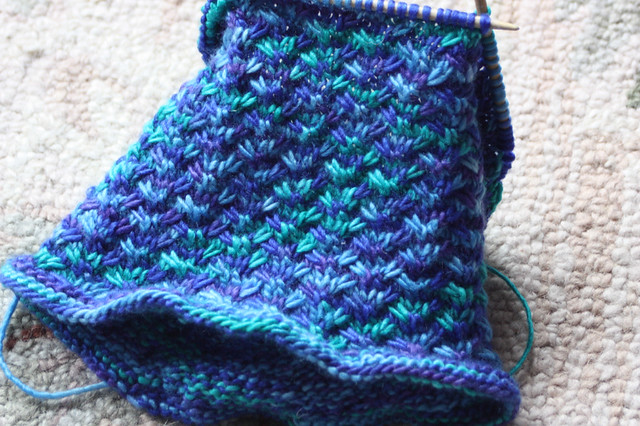
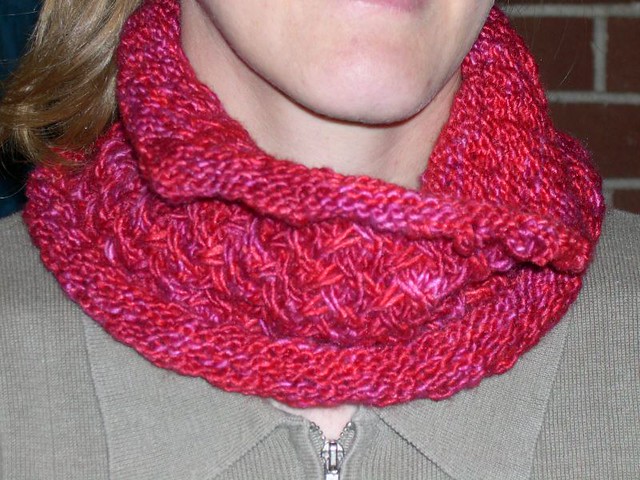
Enjoy my Vegas Sands Cowl (more a neck warmer really... maybe I should change the name?).
Orignially published in Summer 2008
Materials:
1 skein Malabrigo Silky Merino shown in Amoroso (red/pink) and Caribeno (blue/green) colorway
Size 7 circs, 16” length
Tapestry needle for weaving in ends and a stitch marker
Gauge: approx 5 sts/inch in stockinette, approx 22 sts/4
inches in pattern
Finished size: about 8” long by 18” around
Pattern stitch (adapted from Grumperina’s Shifting Sands Scarf):
Worked over 4 rows:
Row 1 (RS): *1/2LC, K2,
repeat to end
Row 2 and 4: knit
Row 3: *k2, 1/2RC, rep to end
Pattern:
Loosely CO 105 sts using whatever method you like to give you a
nice-edge, join for knitting in the round making sure not to twist your stitches, place a stitch marker. Work 5 rounds in garter stitch (starting with a purl round, then a knit round... lather rinse repeat).
Next row: begin the pattern stitch and continue knitting in
the round until the piece measure approx 7.5”. Follow up with another 5 rounds of garter stitch. Bind off loosely in your favorite
manner!
Finishing: Weave in ends, block if you want, but I didn’t, don cowl and look MAGNIFICENT!
Abbreviations:
1/2LC: slip 1 st to cable needle and hold in front, k2,
then knit1 from cable needle
1/2RC: slip 2 sts to cable needle and hold in back, k1, then k2 from cable needle
Alternative Picot Bind-off shown in red/pink version:
Work picot bind off as follows:
*Knit 1 st. Slip knit st back to left-hand needle. Use cable cast on method to cast on 2 sts. Bind off 7 sts. Repeat from * until all sts are bound off. Cut yarn. Using yarn tail, connect the first picot point of the round to the last bound-off stitch.
*Knit 1 st. Slip knit st back to left-hand needle. Use cable cast on method to cast on 2 sts. Bind off 7 sts. Repeat from * until all sts are bound off. Cut yarn. Using yarn tail, connect the first picot point of the round to the last bound-off stitch.
I hope you enjoy it!
Friday, October 28, 2011
Hello World!
I have decided that I will attempt, for as long as possible, to keep up a web diary of sorts. Keep in mind that I don't expect any kind of audience, and since I will assume I am speaking to ether, I may just blurt out stuff that I otherwise wouldn't say....
Forgive me?
Forgive me?
Subscribe to:
Comments (Atom)
